Intro to CSS
Goals
- Style HTML element using CSS rules
- Use class and ID attributes on HTML elements to more specifically target them in CSS
What is CSS?
CSS is a way to add style to HTML documents on the web. It’s incredibly powerful!
Let’s take a look at some examples of CSS in action: CSS Zen Garden. You’ll notice that every single one of these web pages has the exact same HTML - all the differences in layout and look are achieved through CSS!
While CSS is typically used to control the layout and details of the way a site looks, artists have also used it to create some pretty incredible pieces - check out these portraits and this card.
CSS Rules
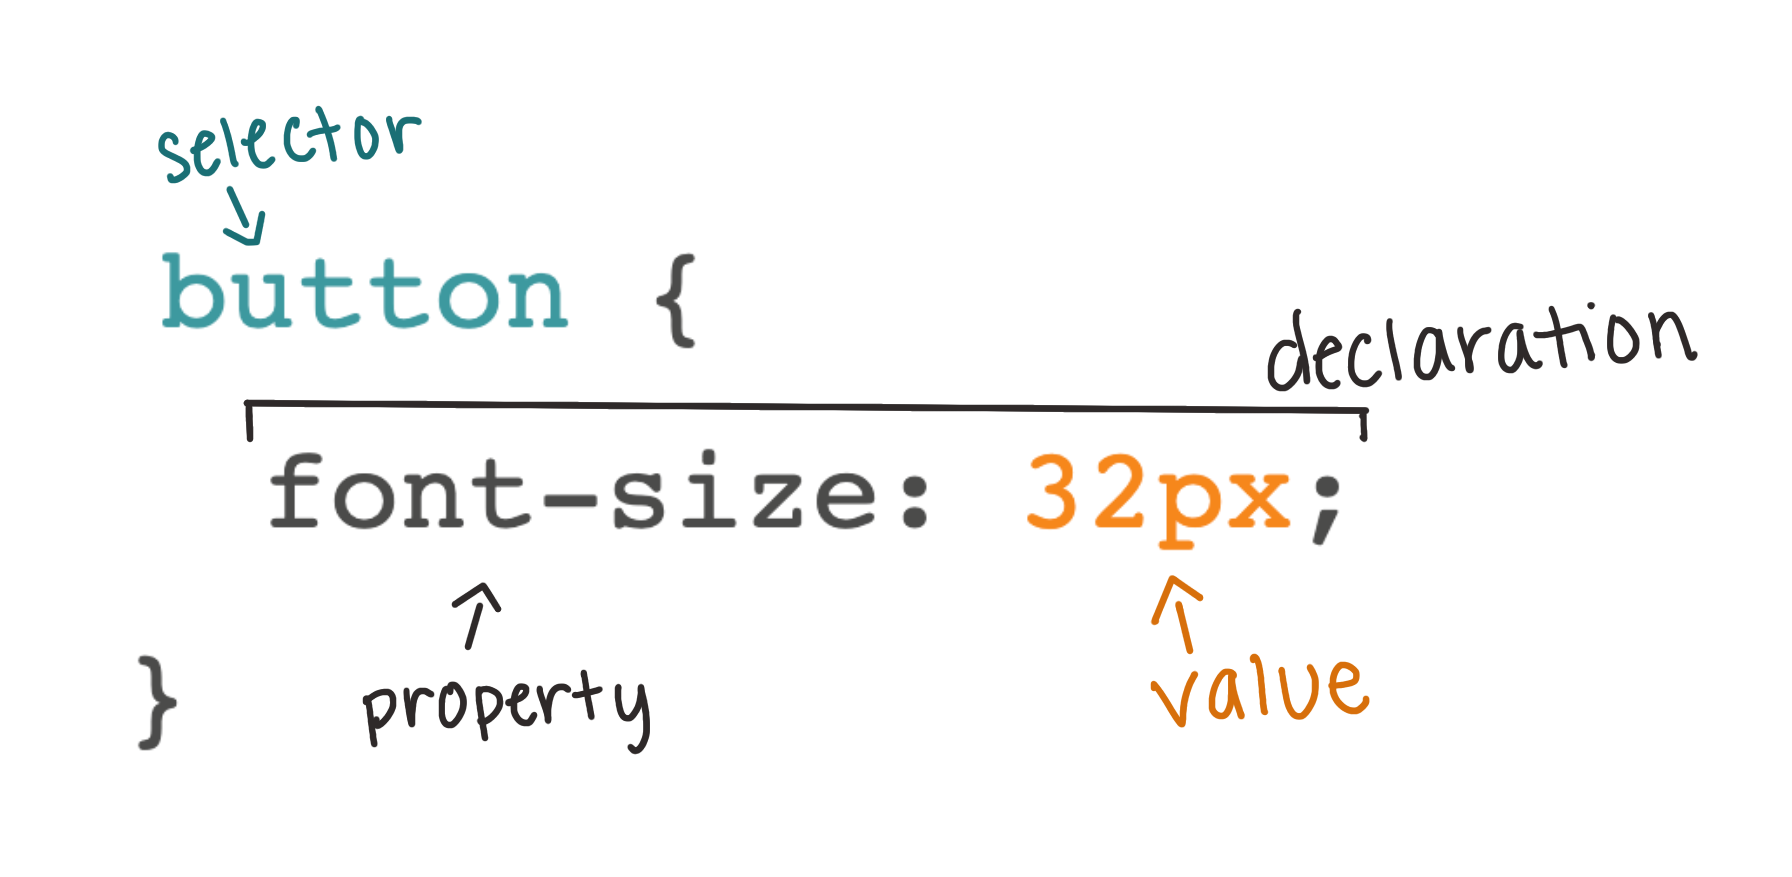
How do we write CSS code that instructs the browser to make elements appear differently? We write CSS rules - a set of instructions for each element to follow.

button {
  font-size: 32px;
}
In the previous example, the browser will set the font-size of the font within any button on the page to 32px. We can provide multiple declarations inside of a rule, such as:
button {
  font-size: 32px;
  font-family: sans-serif;
  border-radius: 3px; /* rounds the corners */
}
CSS Colors
There are many ways that we can express the value of a color to the browser. Today, we will just discuss two of them:
- Color Names - written in English, these names describe the color. We are limited to 140 of them.
- Hex Values - a six-digit code (letters and/or numbers) preceded by a
#allows us to have many more combinations of colors; 16,777,216 to be exact! “Hex” is short for “hexidecimal”, a number system with 16 values instead of our more familiar “decimal” system with 10 values. There are many websites that allow a user to pick a color from a color wheel, then provide the associated hex value.
Try It: Writing your First CSS Rule
Add two button elements to your HTML. They can be anywhere!
In the CSS file, write a rule that targets all of your button elements.
Change both the color and background-color using CSS. Observe the output in the browser. What is the difference between these two properties?
Explore: Remove the -color from background-color. What happens? What can you infer from this?
Other Commonly Used Properties
There are 500+ properties available in the CSS language. It is unlikely that any developer knows every single one. But, there are many commonly used properties that folks who write CSS with some regularity will come to memorize.
Here are a few great places to start:
- font-size: this property expects a value with a unit; today we’ll introduce
px(pixels) and%(percent). Example declaration:font-size: 100px; - border: accepts 3 pieces of information: the width of the line, the style of the line, and the color. Example declaration:
border: 2px solid #401AA5; - height & width: each of these properties needs a value with a unit. We recommend starting with pixels. Example declaration:
height: 200px; - the most common CSS properties: this reference from MDN lists the most common CSS properties and is a good place to start looking for other interesting things to try!
Try It: Exploring CSS
- Write a CSS rule that targets the paragraphs, then change their
background-colorandfont-size. - Write a rule that targets image(s) - change the dimensions to your liking.
- Write a rule that targets the main heading - change the
colorof the text and add aborder.
Continue to explore and add declarations to make the site your own!
🌶 Finished? Click here for a Spicy Challenge 🌶
Check out the opacity and box-shadow properties and implement them on your site.
Sidenote: How Should I Organize My CSS Properties?
This is a great question with no one answer. According to a poll from CSS Tricks, the most popular way to organize your properties for any specific element is to group by function (for example, positioning properties, color properties, text properties, etc.)
MDN also has some great tips for organizing your CSS which become especially helpful as your CSS files become bigger and bigger.
Classes and IDs
There will be times when we want to target one paragraph element, but not the 37 others on the site. There will also be times when we want to write a CSS rule for some paragraphs, but not all. This is a great opportunity to use a class or ID attribute!
- Classes can be used to identify one or more than one elements
- IDs can be used to uniquely identify one element
Below is the syntax to apply classes to HTML elements:
<h2 class="sub-heading">Welcome!</h2>
<h2 class="sub-heading">More Info Below</h2>
<img class="icon" src="https://d682ma8ami8n4.cloudfront.net/images/TuringSchool_LogoMark_Gray.png"/>
To target classes in CSS, we need to use a specific syntax starting with a dot, like the example below:
/* classes start with . */
.sub-heading {
  color: teal;
}

.icon {
  border: 2px solid black;
  height: 50px;
}
Below is the syntax to apply IDs to HTML elements:
<button id="log-in-btn">Enter Site</button>
<a id="google-link" href="https://www.google.com/">Google</a>
To target IDs in CSS, we need to use a specific syntax starting with a pound sign (or hashtag), like the example below:
/* IDs start with # */
#log-in-btn {
  background-color: grey;
  border: 3px solid teal;
}

#google-link {
  background: #fbbc05;
  border: 2px solid #34a853;
  color: #4285f4;
  font-weight: bold;
  text-decoration: underline;
  text-decoration-color: #ea4335;
}
Try It: Classes & IDs
In the HTML text editor, add a class attribute to at least 2 of your paragraphs. In the CSS text editor, use that class to give the same styles to 2 of your paragraphs, but not to the other(s).
Based on how you'd like to style your page, if you see the need for additional classes or IDs, go ahead and implement them!
As you are probably in the habit of by now, observe the changes in the browser.